


This post may contain affiliate ads at no cost to you. See my disclosures for more information.
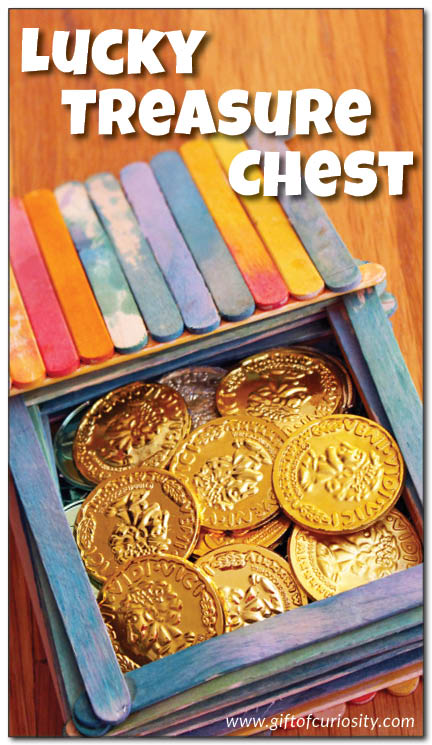
Do your children grab every bag, box, and container in sight to store their special items? Mine sure do! So together we made this lucky treasure chest craft using painted craft sticks to give them a special place to store their “treasure.”
Note: For more kid-friendly craft ideas, see my arts and crafts for kids page.
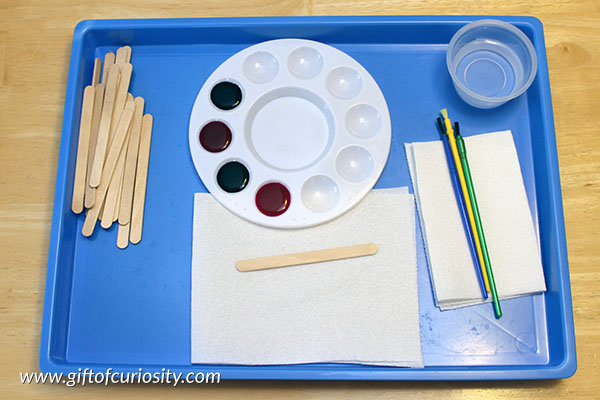
We completed our treasure chests in two phases. The first phase involved painting our craft sticks. I set out a tray for each of my children with the following materials:
- A handful of craft sticks
- A plastic paint palette filled with several colors of liquid watercolor paints
- A paint brush
- A cup of water
- Plenty of paper towels
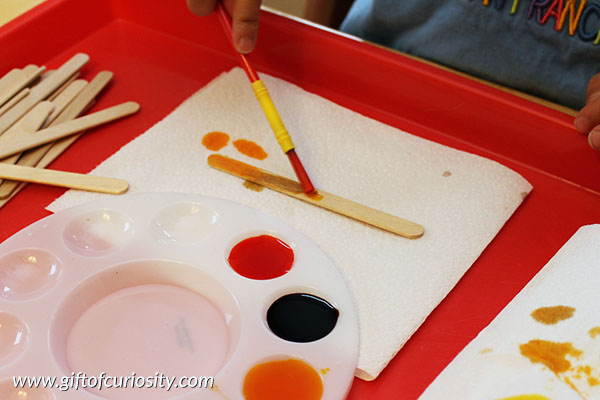
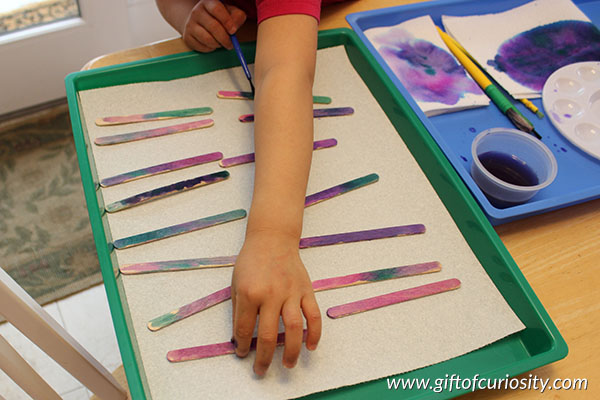
The first step is to paint your craft sticks. I let my kids pick the colors they wanted.
Then let your craft sticks dry. We set them to dry on a tray covered with a paper towel.
Once the craft sticks are dry, it is time to assemble your treasure chests.
Start by dripping a layer of glue along the length of two craft sticks laid out parallel to each other.
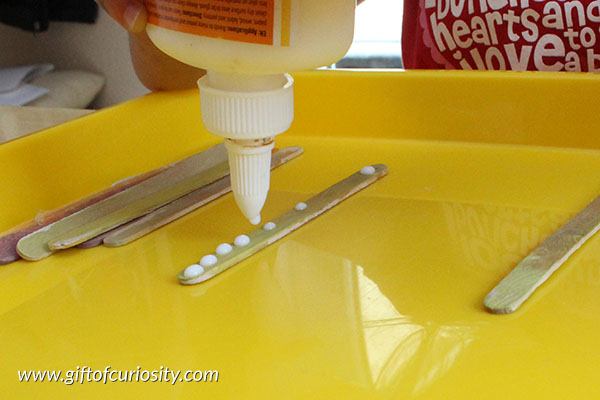
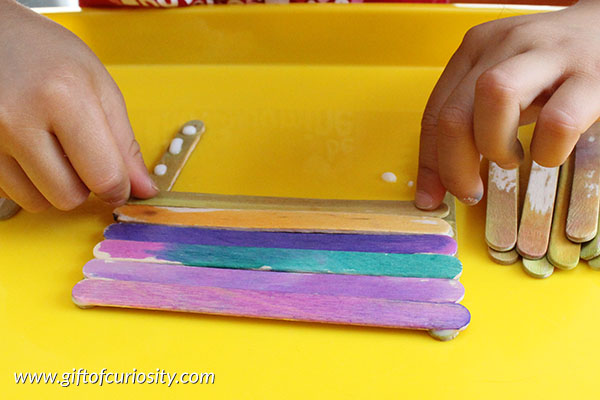
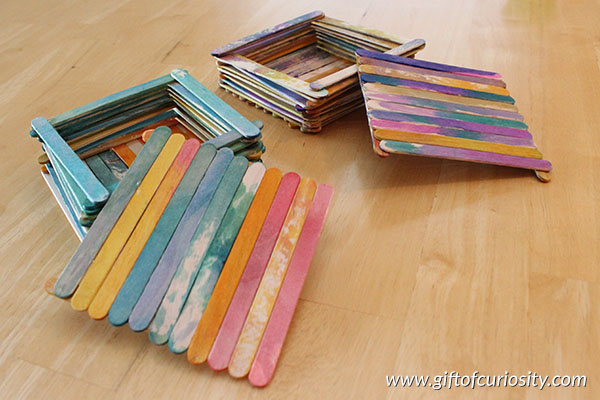
Place other craft sticks, painted side up, perpendicular across the two parallel sticks. Place multiple sticks side by side until you have formed a solid square of craft sticks. This will be the bottom of your treasure chest craft. Repeat this procedure once more to create the top of your treasure chest craft.
Give the glue on your bottom a few minutes to dry. Then turn it so the outside is facing down and the inside is facing up.
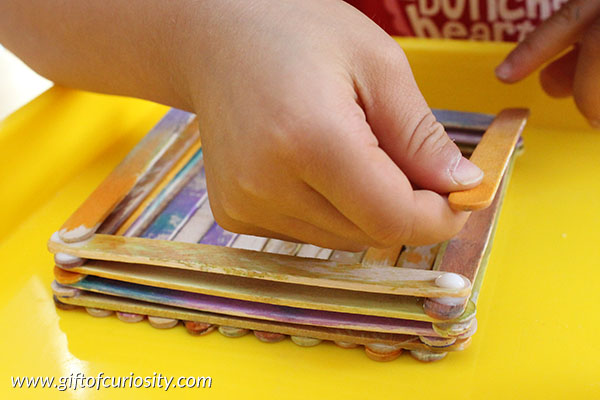
Add a dot of glue on each corner, and lay two sticks parallel along the edges.
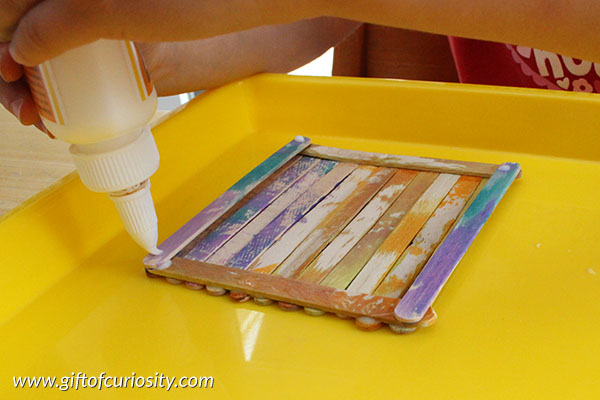
Repeat, but this time lay the sticks in a perpendicular direction to the first two sticks laid down.
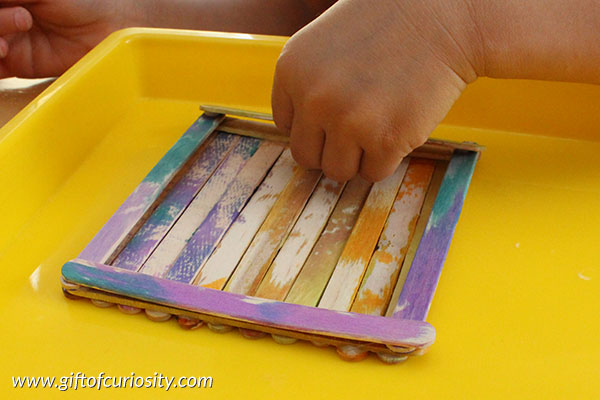
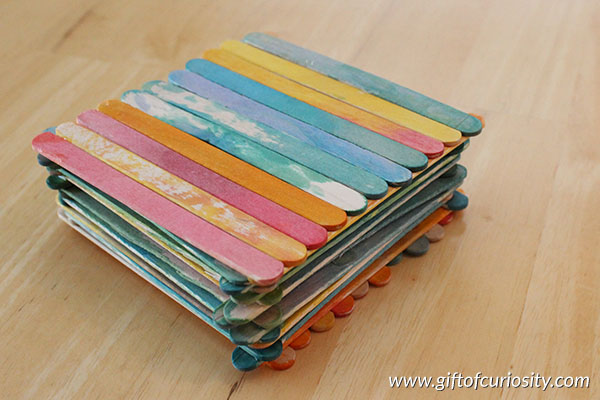
Continue adding layer upon layer of craft sticks, always alternating which direction each layer faces.
Once you’ve used up all your painted craft sticks – or your treasure chest has reached the desired height – stop adding new layers. Let the glue dry and your treasure chest craft will be complete!
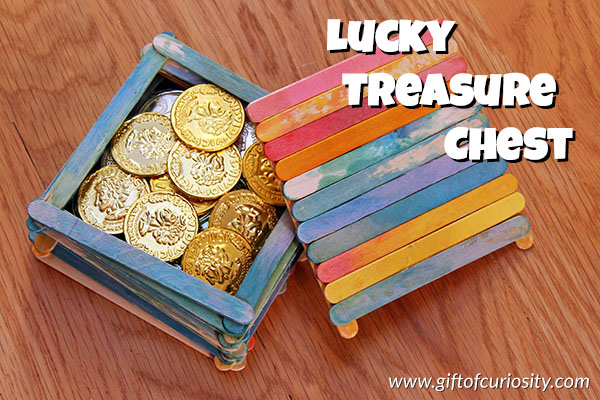
Your children can fill it with their favorite goodies and then put the lid on to keep them safe.
During our pirate unit, we used our lucky treasure chests to store all the pirate gold we collected!
More Pirate learning resources
More pirate posts from Gift of Curiosity:
- Pirate Montessori activities
- Pirate sensory bin and small world play
- Parts of a pirate ship
- Lucky treasure chest
- Make your own telescope
- Make your own compass
- Books about pirates
You can find more pirate-themed activities and printables on my Pirate Unit Study page and my Pirates Pinterest board.
Follow Katie @ Gift of Curiosity’s board Pirates on Pinterest.
Products mentioned in this post:


I found a big box of craft sticks to make the snowflakes which they painted today and put glitter on top. We talked about how we could make our sticks go different directions but most of the kids liked them one on top of the other. Thank you for this great idea as I was wondering what else we could do to use these craft sticks. Bad me calling them popsicle sticks! I don’t ever give the kids popsicles anyway. LOL. You are amazing. Thank you.
Faye