


This post may contain affiliate ads at no cost to you. See my disclosures for more information.
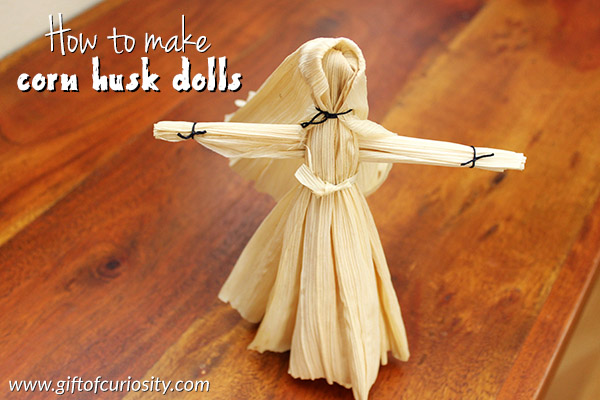
A long time ago, before you could walk into your nearest store and pick up a factory made doll from the shelves, parents and children had to make their own dolls. It is believed that Native Americans began making dolls from corn husks over a thousand years ago.
Today, corn remains an important staple food for many people in the Americas, and young children can learn to make their own corn husk dolls with just a bit of assistance.
In this post I am sharing directions for how to make corn husk dolls.
Note: For more corn activities, see my Corn Unit Study page.
To make corn husk dolls, you will need:
- At least 5 corn husks for each doll you plan to make (I picked some up from our local grocery store, but you can find them on Amazon and possibly also in craft stores.)
- String or raffia (we used string to make our dolls, but raffia provides a more natural look)
Step 1:
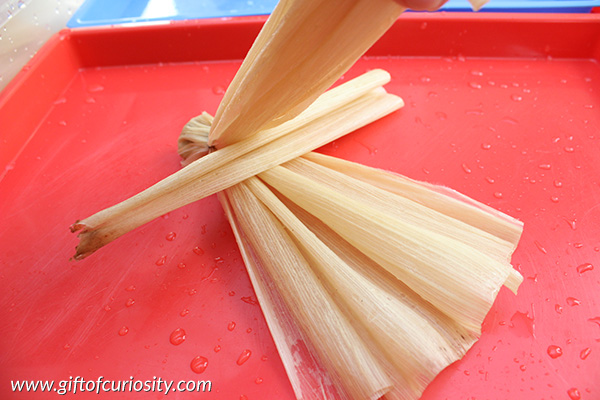
Start by soaking your corn husks in water to make them soft and pliable. Do this for an hour or so before you need to work with them. You may want to place a heavy object on top of them to keep them submerged in the water.

Step 2:
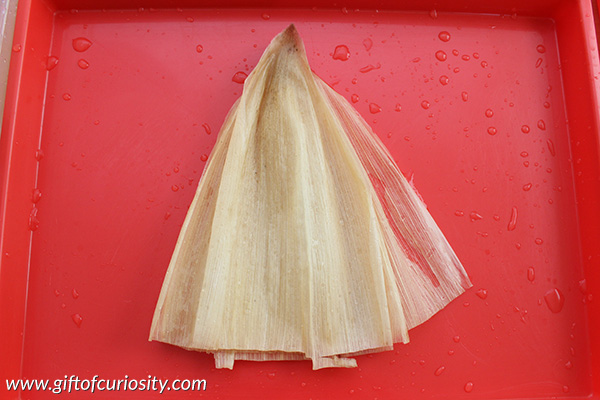
Grab four corn husks. Lay them in a flat stack, one on top of another. Make sure the narrow, pointy end of the corn husks are all pointing the same way.
Step 3:
Using your string or raffia, tie the narrow, pointy end of the corn husks together about 1 inch (3 cm) from the top.
Step 4 (not pictured):
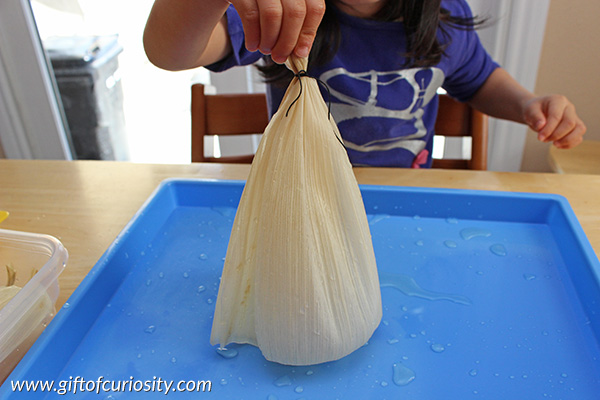
In each hand, grab the untied end of two corn husks. Spread them apart, flipping them over and back together so that your four corn husks are in a stack once again. However, the end you tied in step 3 is now tucked inside and hidden away. The part that is tucked away will form the head of your doll.
Step 5:
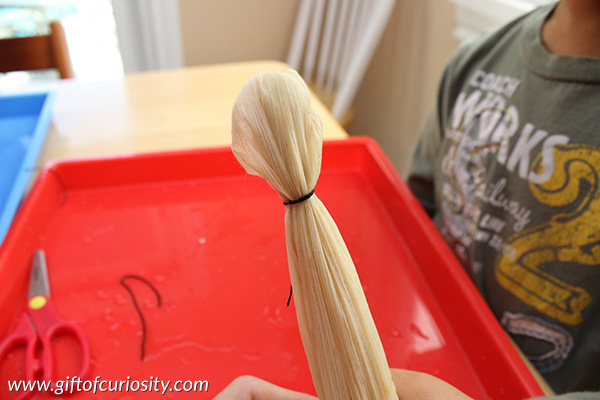
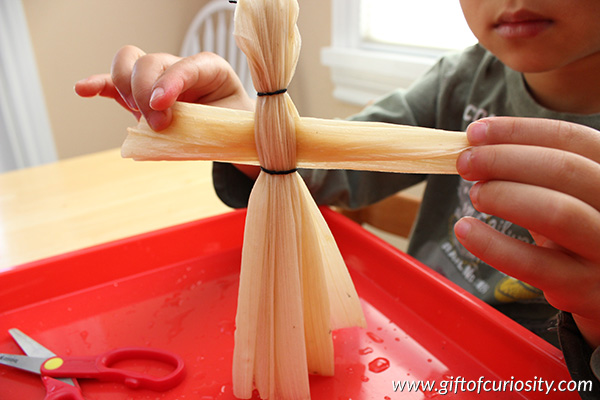
Tie a string or piece of raffia about 1″ (3 cm) from the top end of your corn husks (the end that is tied off and tucked under). The section above the string or raffia is the head of your doll.
Step 6:
Lay your doll down. Grab the top two layers of corn husk and pull them away from the bottom two layers. Inside, lay a rolled up piece of corn husk perpendicular to the rest of the corn husks. This rolled up piece will become the arms of your doll.
Step 7:
Tie another piece of string or raffia under the arms you just inserted. If needed, trim the ends of the arms to create arms of your desired length.
Step 8:
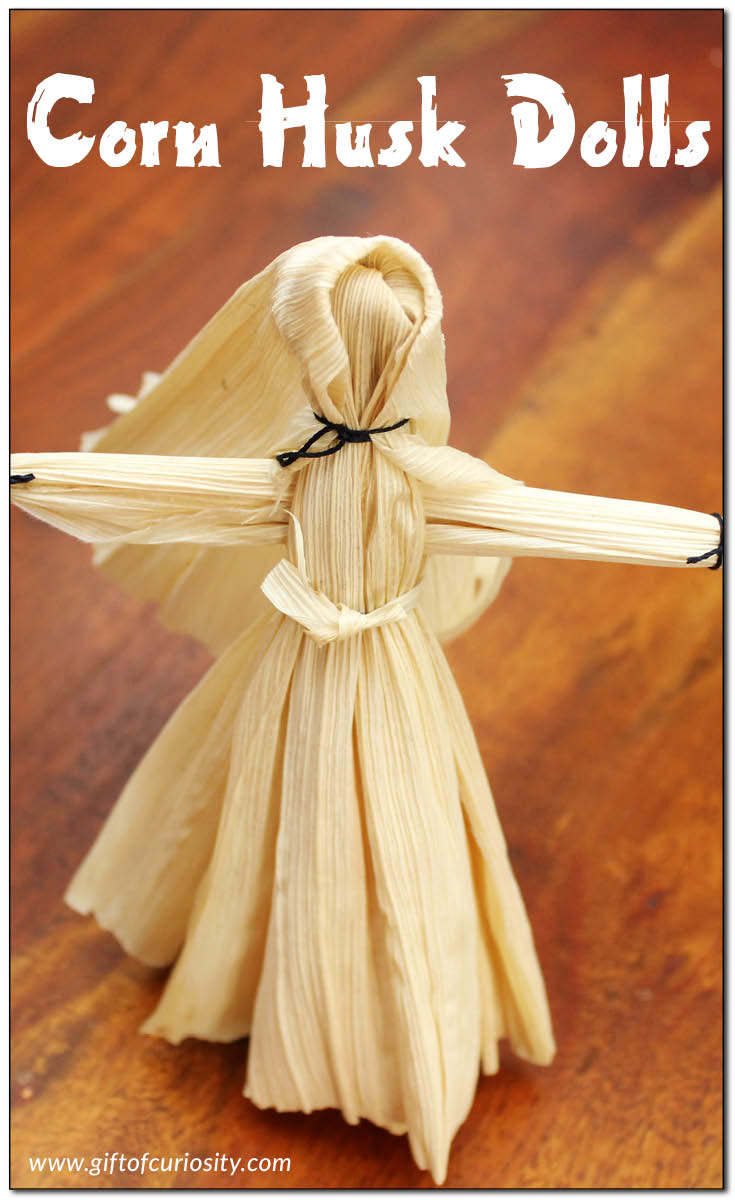
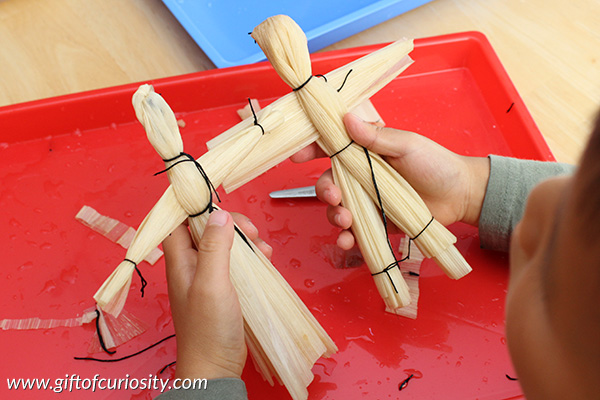
If you want a “girl” corn husk doll, you are done! The corn husk beneath the arms becomes the “skirt” of the doll.
If you want a “boy” corn husk doll, use scissors to make a cut up the middle of the corn husks to right below where you tied the string under the arms. Then use string or raffia to tie each leg at the bottom.
Step 9 (optional):
Traditionally, Native Americans did not put faces on their corn husk dolls. My kids, however, wanted faces on some of their dolls, so they drew them on with markers.
You can also use extra corn husks to add fancy things such as hair, belts, hats, head coverings, aprons, etc. Indeed, the corn husk dolls we made are fairly simple, but a quick search online will show that corn husk dolls can be a real work of art!
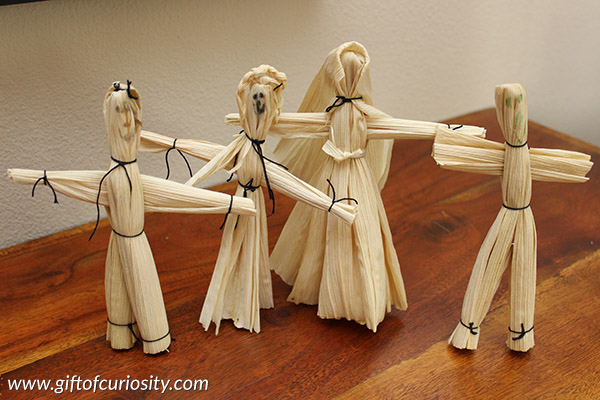
These are a great craft for fall or when learning about Native Americans.
And now you know how to make corn husk dolls!
More corn resources
More corn posts from Gift of Curiosity:


These are so cute, I can’t wait to make them with my girls! My heart longs for a simpler time and I’m looking forward to teaching my girls more and more about simplicity and keeping their heart from materialism. I just know they would love making these and playing with them. Thank you so much for sharing this!
I tried it. And it was awesome.
How neat, Katie! My mom has a collection of corn husk dolls so when I saw your post I just had to share it with her. I think I’ll share it with my sponsor child in Peru, too! Dolls are her favorite thing, and I think she’s old enough to make these! Great fall project!
I’ve seen some really amazing corn husk dolls, but even the plain and simple ones we made are great fun. And making them is like an art lesson and a history lesson all rolled into one!
These are so cute! I will make it with my children! Thanks for your inspiration!