This post may contain affiliate ads at no cost to you. See my disclosures for more information.
It is not every day that my kids and I do an activity so amazing that I keep saying things like, “Wow!” and “So cool!” and “Holy cow!” over and over. Nonetheless, that is exactly what happened last Halloween when we made these AWESOME ghost bubbles.
What are ghost bubbles? They are opaque bubbles filled with fog rather than air. (The “fog” is actually gaseous carbon dioxide from dry ice.) Ghost bubbles have an ethereal quality to them, and they were loads of fun to make and play with. If you have ever looked for a fun way to add some learning and fun to Halloween, find out how you can make ghost bubbles by reading below!
Note: For more kid-friendly Halloween activities, see my Halloween activities for Kids page.
First a note of caution: Dry ice, which is actually frozen carbon dioxide, can be dangerous if not handled properly. Kids should be closely supervised when using dry ice and making ghost bubbles. Click to learn more about handling dry ice safely.
Okay, now that the important safety announcement is out of the way, here are the materials we used to make ghost bubbles:
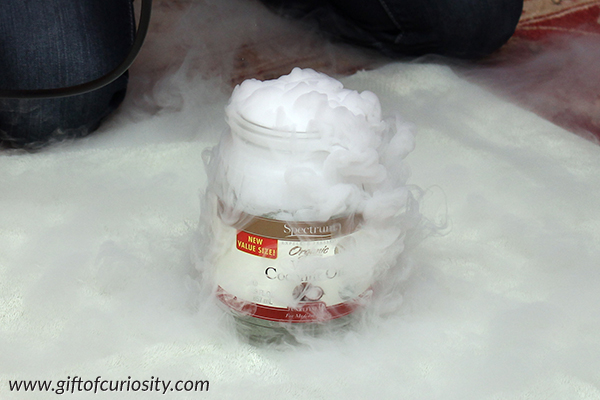
- A container large enough to hold a sizeable chunk of dry ice (I used an empty coconut oil jar, but any sizeable glass or plastic container you can fit a funnel over should work)
- A funnel (must be large enough to fit over the opening of your large container)
- About 2 feet of flexible plastic or rubber tubing that fits snugly on the end of the funnel (you can pick this up at your local hardware store)
- A small plastic cup with a hole cut in the end (the other end of the plastic tubing goes here)
- A small container filled with bubble solution, must be larger than the small plastic cup you are using
- Dry ice (check with your local grocery store or fish market around Halloween)
- Optional: Towels to keep your work surface clean, and also allows you to set the bubbles down without them popping
- Optional: Gloves for kids’ hands (we just used socks pulled over their hands), which allows them to hold the bubbles without popping them
The first thing I did was to drop a chunk of dry ice into our large, glass container. It immediately began producing “fog” as the dry ice sublimated (turned from a solid to a gas without passing through the liquid stage). Already this activity was super cool.
Safety note: Once your dry ice is inside the container, you must always maintain an outlet for the air pressure it generates. This means you should never, under any circumstances, put a lid on the jar because it could cause the jar to explode if the pressure builds too high. You will note that when I put a funnel over the jar in the next step below, there was still an outlet for the air pressure to escape (which is actually what “blows” the bubbles).
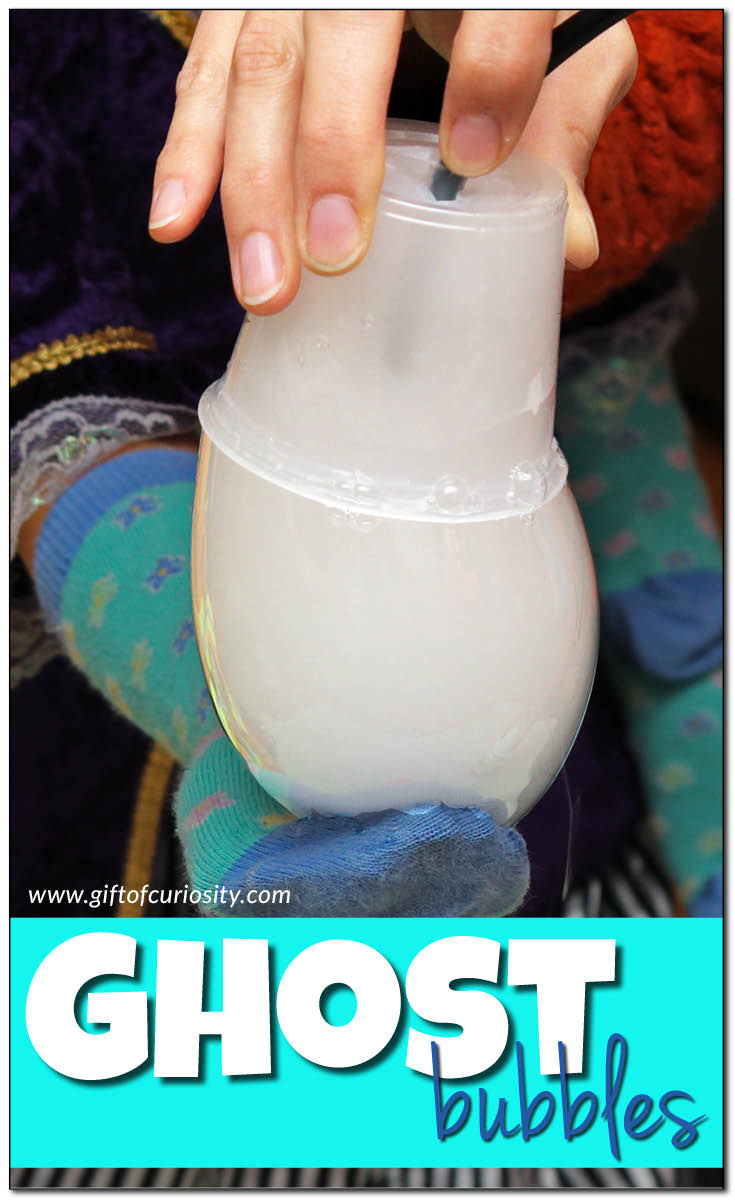
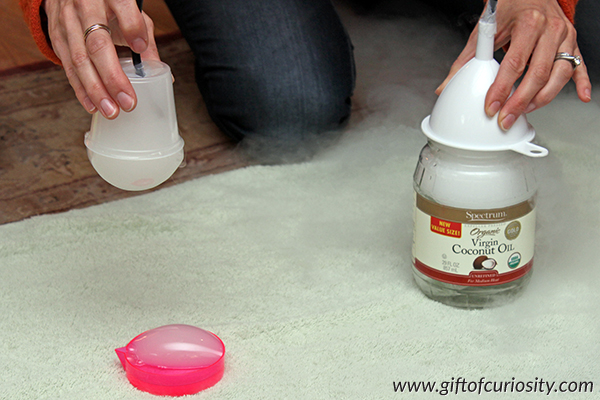
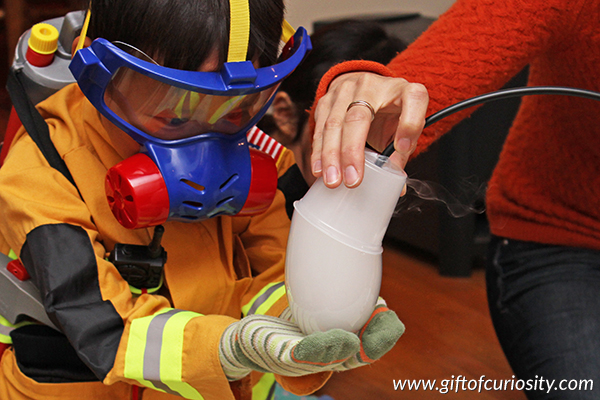
I then placed the funnel over the opening of the jar. The end of the funnel was connected to one end of a piece of flexible tubing. The other end of the tubing was connected to a small plastic cup. I dipped the open end of the plastic cup into some bubble solution.
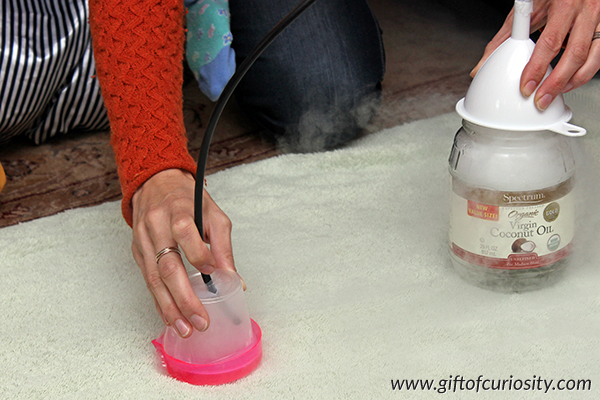
As soon as I lifted the cup from the bubble solution, the “fog” from the dry ice began filling up the inside of a bubble! (This “fog” is simply carbon dioxide.)
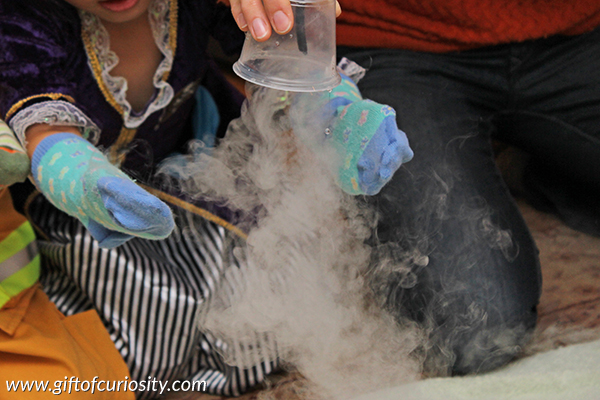
My kids wanted to hold the bubble. Because bubbles generally pop when they touch human skin, my kids wore socks gloves on their hands, which allowed them to hold the bubbles for a bit.

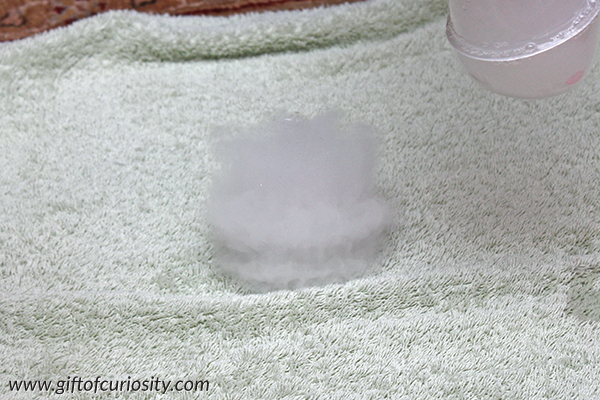
When the bubbles did pop, they left a hazy fog behind. (Ooooh, very ghost like!)
Don’t be alarmed by the next picture – full facial protection is not necessary to make ghost bubbles. My son is only wearing this gear because my kids did this activity in their Halloween costumes. 🙂
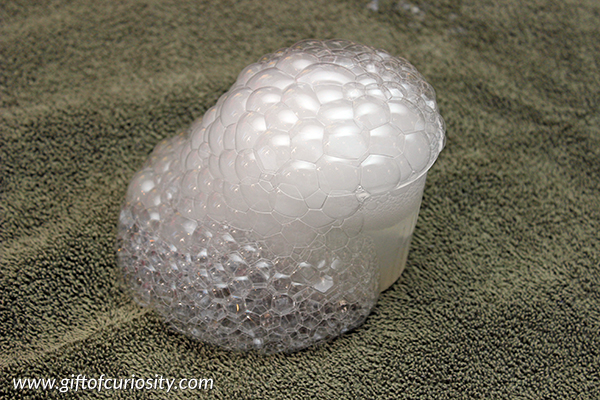
It was really fun to watch the bubbles s-t-r-e-t-c-h out of the bubble blower contraption into my kids’ hands.
And my kids loved holding their ghost bubbles and looking at their foggy insides.

We also placed ghost bubbles onto the carpet and a towel. They truly were opaque, unlike regular bubbles which are transparent.

And when they popped, we loved watching the ghost-like fog dissipate.
Once our dry ice had lost most of its power, I grabbed a small piece of dry ice (taking appropriate safety precautions!) and dropped it into a container of bubble solution. The container immediately began to bubble over!
For a great video on ghost bubbles, see this video from Steve Spangler.
More Halloween resources
More Halloween posts from Gift of Curiosity:
- Books about Halloween
- Mason jar jack-o-lantern
- Candy experiments
- Halloween Montessori activities
- Toilet paper mummies
- Pumpkin decomposition experiment
- Describe a pumpkin using all five senses
- Jack-o-lantern Printables Pack
- Halloween Bingo
- Halloween do-a-dot printables
- Halloween Sudoku
- Pumpkin outlines
You can find more Halloween activities and printables on my Halloween Activities for Kids page and Halloween Activities for Kids Pinterest board.
Follow Katie @ Gift of Curiosity’s board Halloween Activities for Kids on Pinterest.