


This post may contain affiliate ads at no cost to you. See my disclosures for more information.
Want to amaze your kids while also teaching them a science lesson? In part 2 of our preschool botany lessons series, I am sharing how we dyed flowers three different shades of colors in order to teach a lesson about how plants take up water from the ground.
Note: For more botany lessons for kids of all ages, see my botany unit study page.
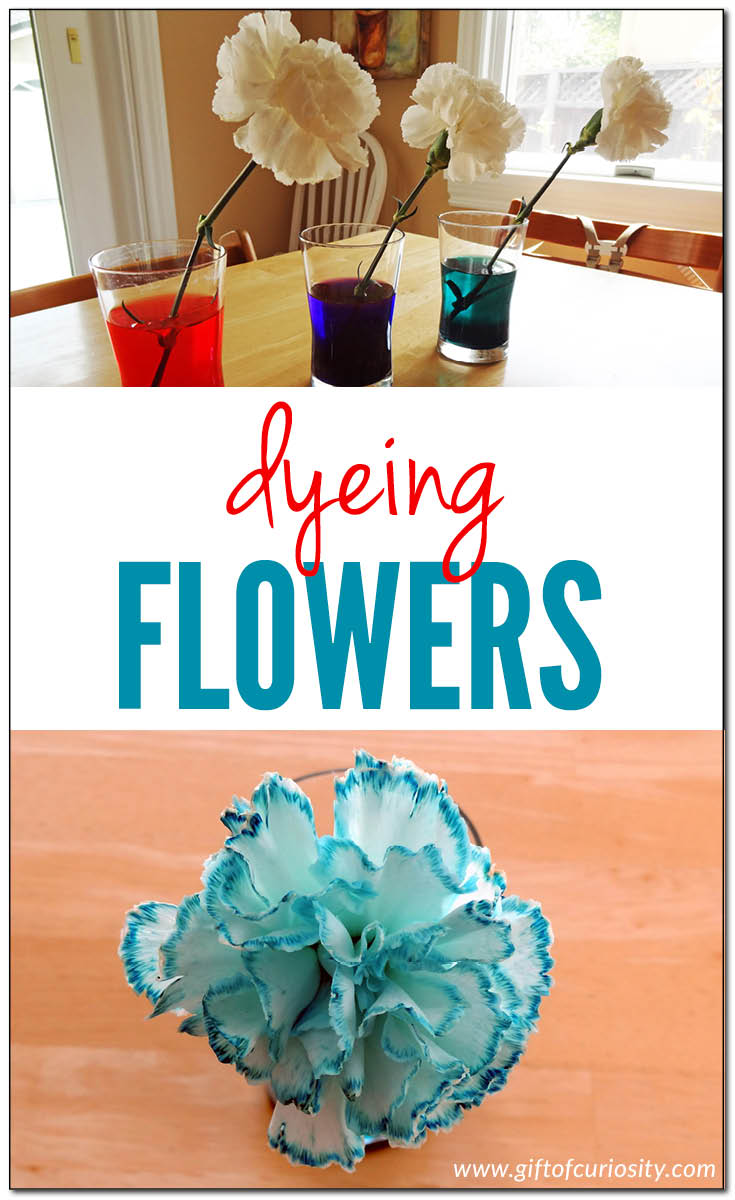
I purchased three white carnations from a local florist and put them into three different colors of water (dyed with our Colorations Liquid Watercolor Paints).

By the next day, they had already started to turn shades of color, although the blue was by far the most pronounced.

The colors continued to deepen for several days.

When I showed the colored flowers to the kids, we talked about where the colors came from. They correctly guessed that the color in the petals had come from the water below, and we discuss how the water comes up the stem to reach the petals.
More botany resources for kids
More botany posts from Gift of Curiosity:
- Teaching kids where food comes from
- The basics about plants
- Dissecting flowers
- Vegetable people craft
- Sprouting seeds
- Do seeds need light to grow?
- How leaves breathe
- How leaves get water
- Why do leaves change colors?
- Gardening do-a-dot printables
- Leaf rubbings book
For more botany activities for kids of all ages, see my Botany Unit Study page and my Botany Pinterest Board.
Follow Katie @ Gift of Curiosity’s board Botany Unit Study on Pinterest.


I really love this and it is on my to do list with the boys – thanks for the reminder and linking up with #MotivationalMonday
Oooh, those turned out wonderfully!! Thanks for sharing this at Teach Me Tuesday at Preschool Powol Packets!!
Wow! I did not know this could happen!
I really love science experiments and lessons that are simple and straightforward. This is a great idea and I will be using this with my own kiddos. Thanks for posting!
I saw this link from Family Fun Friday and had to write as I took a carnation from Mother’s Day and did the same thing. I am still waiting though. I will be away for a few days and I wonder if anything will happen when I get back. Did you do anything special with the stem?
Blessings,
Janis http://www.janiscox.com
I didn’t do anything special – I just cut the bottom off and put them in the colored water. Within 2 hours I could see a color appearing on the flower in the blue water, but it took longer for the flower in the orange water to show any color. Have fun with this!
Oh I love this…I remember doing this as a science project when I was younger and I thought it was the coolest. When I did it, I think I spit the stem partially down the middle and put one side in one color and the other in another. So glad I saw this on here, I’ll have to do it with my son.
Next time we do this I’m going to split the stem and put the various parts into different colored water. I can’t wait to see what the flower ends up looking like!
Wow – such a great experiment! I will be doing this with my girls … I think we have white Camelias in the garden, maybe it will work for those too? We’ll see …
Such a fun lesson!! Thank you for sharing at Sharing Saturday!!
That’s a neat science project. I think you can do something similar with celery, but the flowers look so much prettier.
Great idea to use liquid watercolors! Why didn’t I think of that?
Thanks for linking up to Science Sunday.
Great activities! You’ve explained so clearly.
Just letting you know I’ve featured these on The Sunday Showcase this week: http://www.herecomethegirlsblog.com/2013/06/01/the-sunday-showcase-summer-school.html
Do you dilute the liquid water colour? What ratio do you use?
I am sure I did dilute the liquid watercolors, but I don’t recall the exact ratio. But given how strong the liquid watercolors are, you don’t need a lot of watercolor to make a nice colored liquid. You can probably do 1 cup of water to about 1 tablespoon of liquid watercolors, or add more if you prefer.