


This post may contain affiliate ads at no cost to you. See my disclosures for more information.
Making shrunken apple heads is something I remember doing in elementary school, and it is a perfect fall craft to celebrate apple season or to decorate for Halloween.
These shrunken apple heads give kids practice at carving a 3-D object. They also integrate science, as kids can see what happens when an apple is left to dry out.
With appropriate adult supervision and the right carving tools, kids of all ages can enjoy making shrunken apple heads. Give them a try and see how they turn out!
Note: For more apple activities, see my Apple Unit Study page.
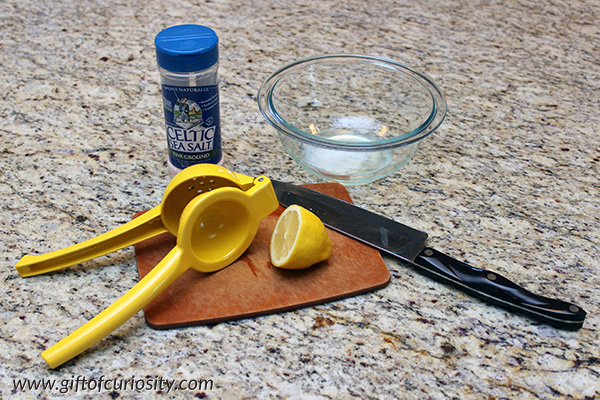
To make shrunken apple heads, you will need to gather the following materials:
- Apples
- Vegetable peeler
- Pencil (optional)
- Some sort of carving tool, such as a paring knife, butter knife, small measuring spoon, or other object sharp enough to cut into apple flesh
- Lemon juice
- Salt
- Optional: dehydrator or oven
Note: This activity requires adult supervision, especially when children are handling sharp tools. Know what your child is capable of handling and provide appropriate support and supervision throughout this activity to keep your child safe.
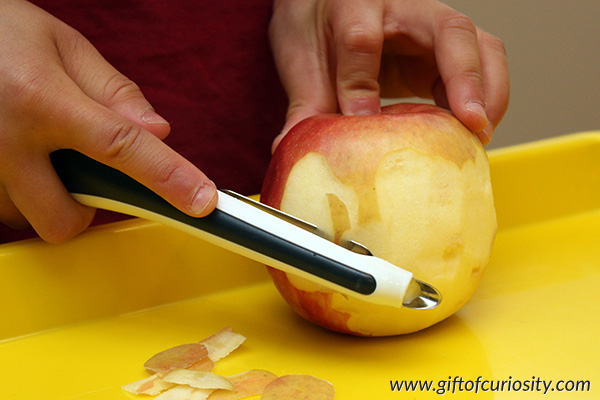
Start by picking an apple. Apples with a wide, round faces make the best carving apples.

Use a vegetable peeler to remove the skin from the apple. Note that if you leave a bit of skin at the top around the stem it will look like your shrunken apple is wearing a hat.
My children were able to do this step on their own, but other children may not be ready to safely use a vegetable peeler on their own.
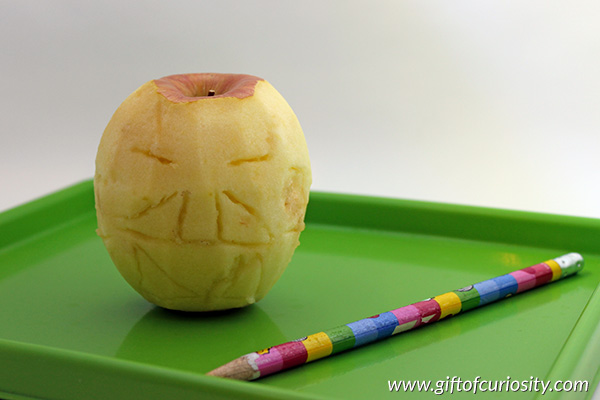
Once your apple is peeled, you may wish to mark where you plan to carve.
We did not have any success using markers to write on the wet apple flesh, so we simply used the pointed end of a pencil to mark lines showing where we wanted to carve.
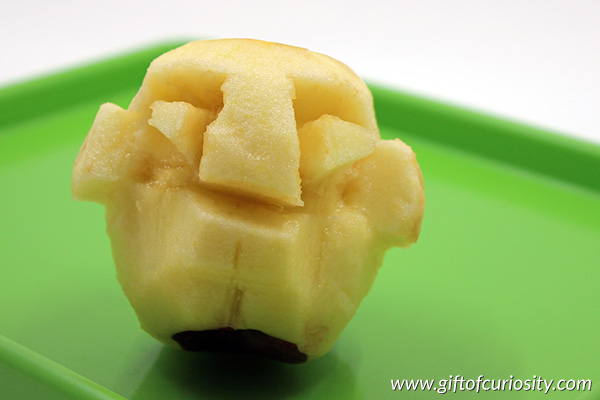
Then it’s time to carve! Grab the carving instrument of your choice – I used a paring knife while my kids used the pointed end of the vegetable peeler – and start carving your eyes, nose, mouth, ears, etc.
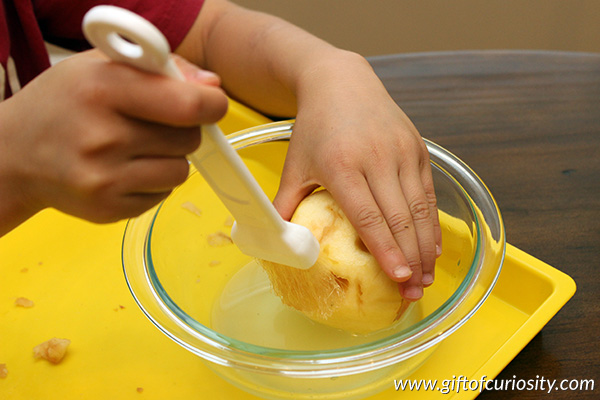
Next, mix together the juice of two lemons with about 1 tbs of salt. (You may need to double or triple the recipe depending on the number of apples you carve.)
Coat the entire apple in the lemon-salt solution, taking care to get the solution into all the nooks and cranies you have carved. This solution will prevent, or at least slow down, mold growth as your apple dries.
Then it’s time to dry your apple!
Here you have a few options. We put our apples in a dehydrator on a low setting for 48 hours. Other people report putting their apples in the oven on a very low temperature. Or if it is hot and sunny where you are, you may be able to simply leave the apples outside in the sun.
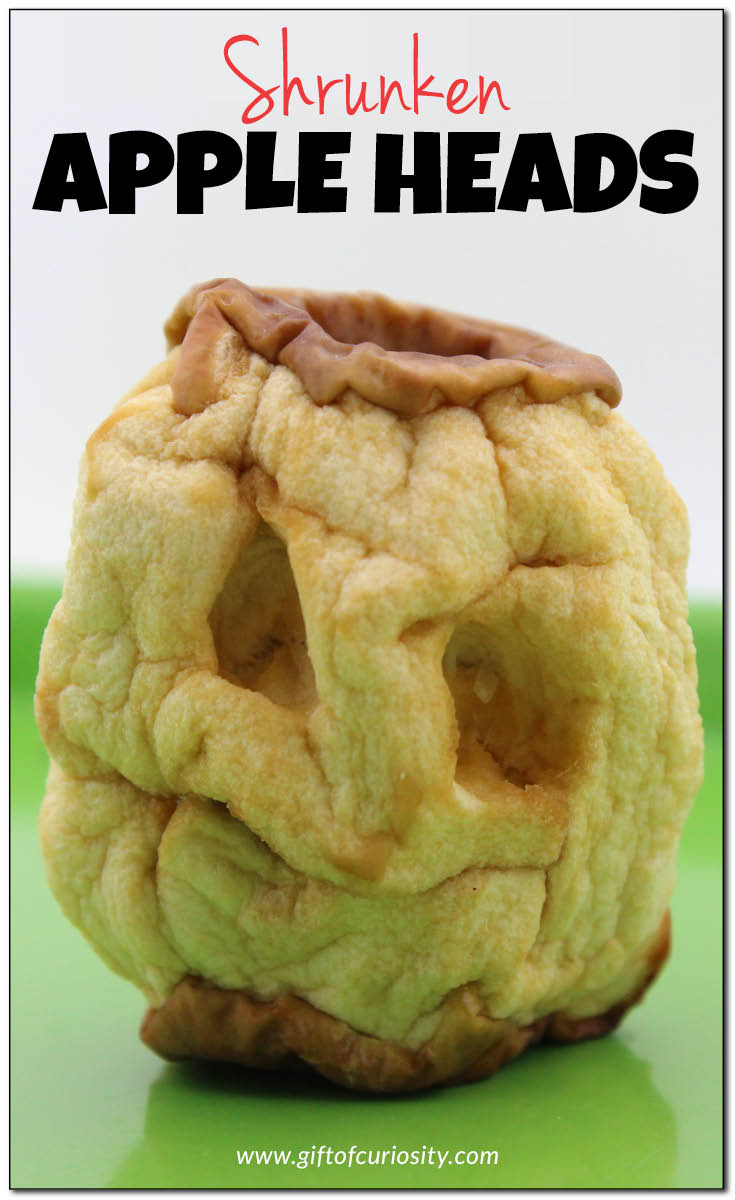
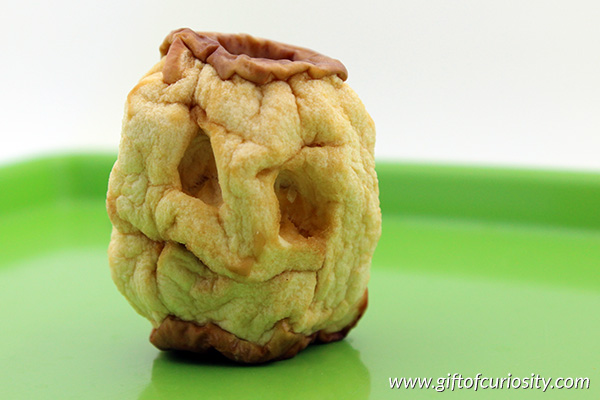
After a couple of days to one or two weeks, depending on your drying method, your apples will shrink and gain a lot of personality. Check on your apples regularly to ensure they are not beginning to mold.
Once your applies have shrunk and dried, display them for all to see! One great way to display them is to put them on a stick or skewer that you can stick in the ground or in a pot.
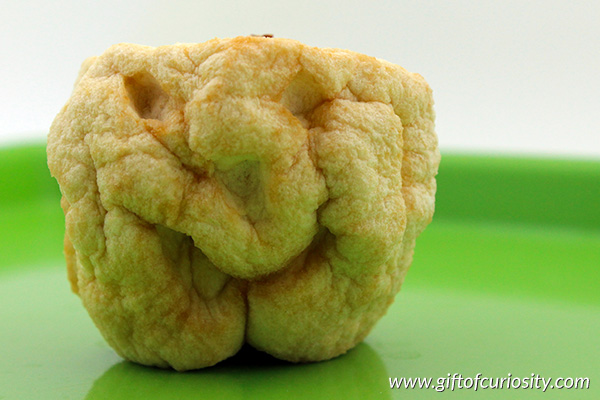
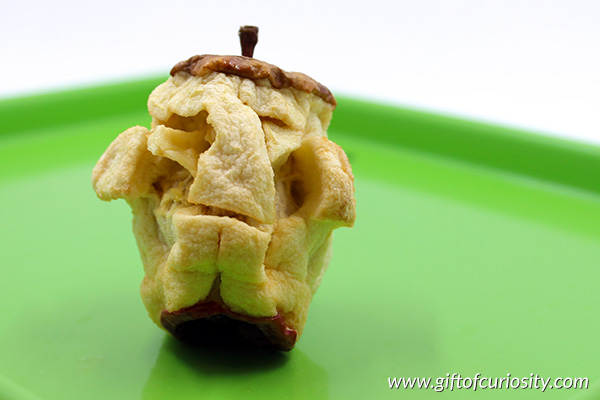
The end result
We carved three apples, and they all turned out so differently!
I adore the mouth on this shrunken apple head – it has so much personality!
And this next one looks to me like a toothless old man with no nose.
This last one looks to me like the hollowed out face of some cartoon bad guy.
What you will your shrunken apple head look like?
If you enjoy this Shrunken Apple Heads activity, you’ll love my Apple Unit Study that includes more than 40 awesome apple activities and 325 pages of apple printables.
See if my Apple Unit Study may be right for you by clicking here.

More Apple Resources
More apple posts from Gift of Curiosity:
- Apple Unit Study
- Apple Printables Pack
- Apple Do-a-Dot Printables
- Apple taste testing
- Apple rotting experiment
- Dissecting an apple
- Apple sensory bin
- Apple Montessori activities
For more kid-friendly apple activities and apple printables, see my Apple Unit Study page and my Apples Pinterest board.
Follow Katie @ Gift of Curiosity’s board Apples unit ideas on Pinterest.

how long were they left in the oven? Overnight long enough???
We used a dehydrator rather than an oven. I can’t say for sure how long it would take in an oven as there are a lot of factors that will influence drying time. If your climate is warm and dry enough you might be able to just leave them out in the sun!