This post may contain affiliate ads at no cost to you. See my disclosures for more information.
In order to understand the weather and why it rains, kids need to know about the water cycle. This simple water cycle demonstration can be done using materials from your kitchen. It not only helps kids understand the basic elements of the water cycle, it also shows why our rain water is drinkable despite the fact that much of our rain water comes from the salty ocean.
You’ll find more resources for learning about weather on Weather Unit Study page my Weather Activities Pinterest board.
Background science
Water covers more than 70% of the Earth’s surface, and all living things need water to survive. The water cycle is nature’s way of purifying, circulating, and replenishing water.
There are four basic steps in the water cycle*:
- Evaporation: When heat from the sun turns liquid water into gaseous water vapor, causing it to rise into the air.
- Condensation: When gaseous water vapor cools at high elevations and becomes liquid (or solid) again
- Precipitation: When liquid water (e.g., rain) or solid water (e.g., snow) falls to the ground.
- Collection: When large amounts of water gather in oceans, lakes, rivers, and streams
* Other steps sometimes listed as part of the water cycle include include transpiration, which is when trees give off water from their leaves, and sublimation, which is when water in solid form (e.g., ice) converts directly to a gas without passing through the liquid stage. The demonstration described only focuses on the four main steps.
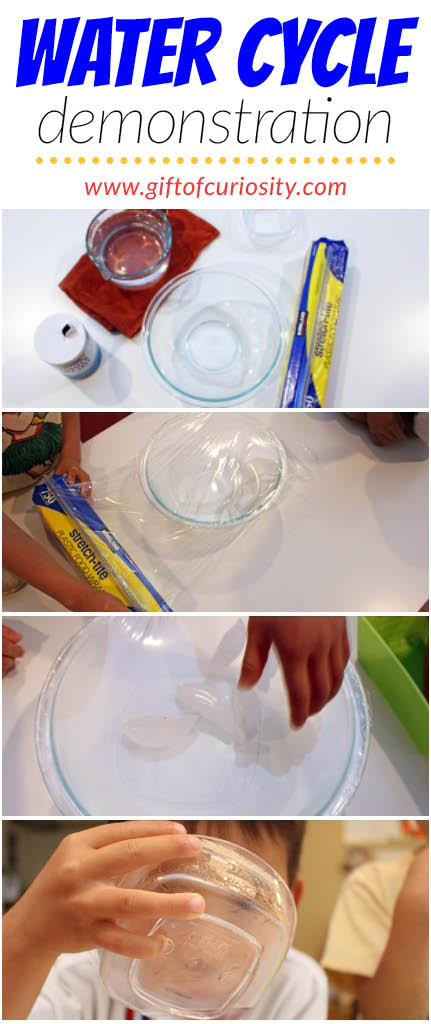
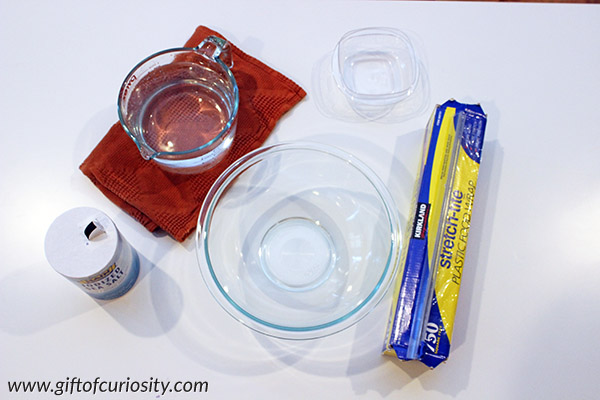
Materials needed for the water cycle demonstration
To create your own water cycle demonstration, you will need to gather the following materials:
- A large, preferably clear container for holding your “ocean” water
- A small container to collect the “rain” that falls
- Warm or hot water (keep kids safe! the hotter the water the faster the demonstration will finish, but safety is more important than finishing quickly)
- Salt
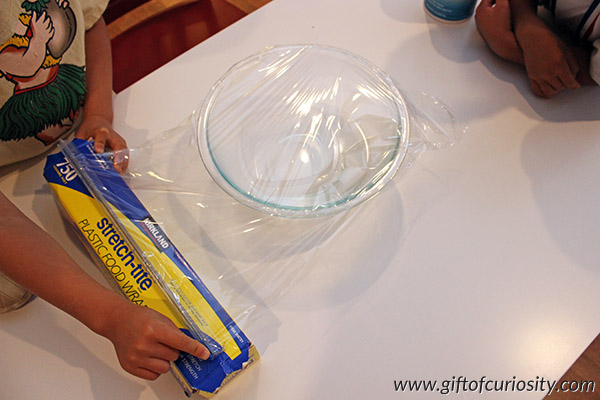
- Plastic cling wrap
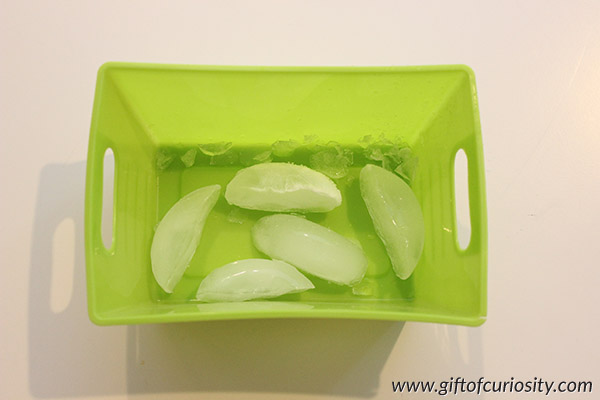
- Ice
How to conduct the water cycle demonstration
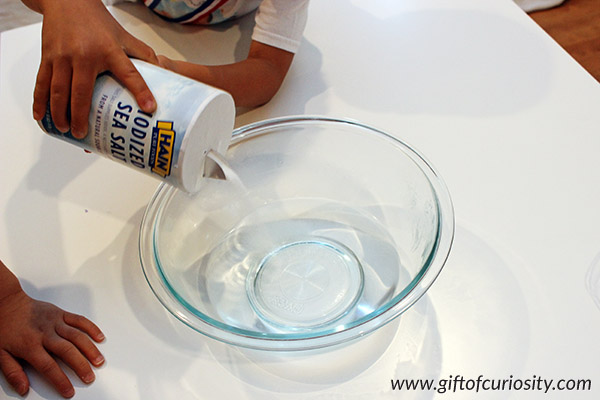
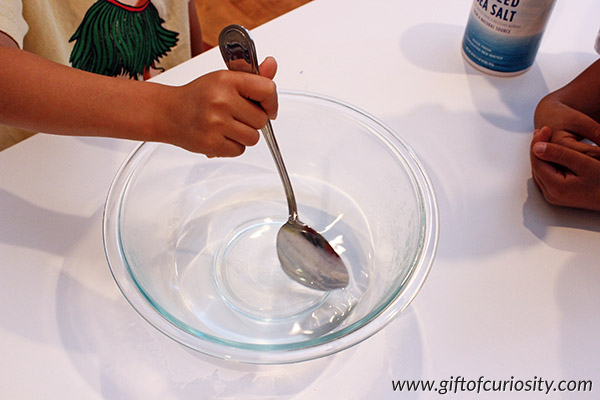
Step 1: Pour the warm or hot water into your large container and add plenty of salt. Stir well to make your “ocean.” (We start with warm or hot water to speed up the evaporation phase of the water cycle.)
Step 2: Place a small container in the middle of your larger container. This is where you will “collect” the rain that falls.
Step 3: Cover the top of your container with plastic cling wrap. This will provide a place for your water to condense into “clouds.”
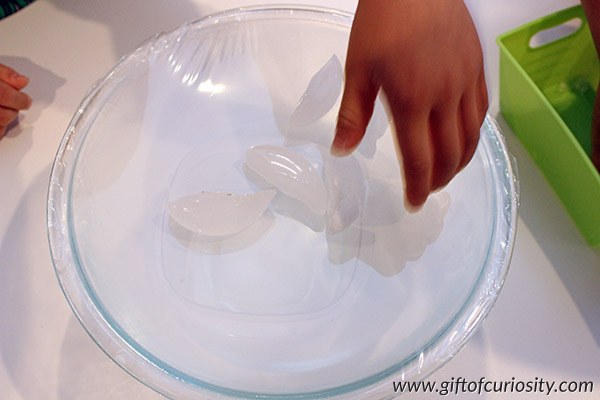
Step 4: Grab some ice. Place several ice cubes in the center of the cling wrap covering the top of your container. The cool ice in the “sky” will cause the evaporated water to condense when it rises up.
Step 5: Wait several minutes. The exact amount of time you need to wait will depend on how hot your water was, among other things.
However, after several minutes you should see water condensing into “clouds” on the underside of the plastic cling wrap.
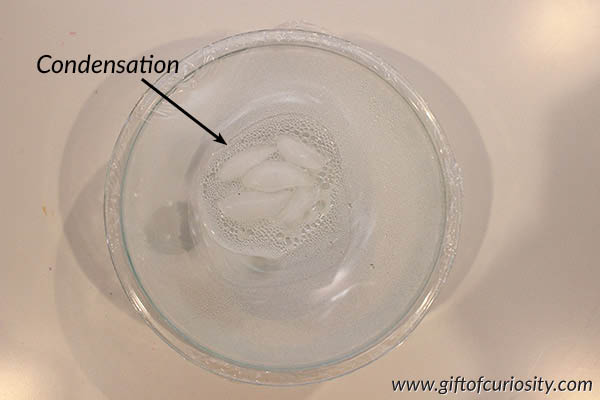
Step 6: Once enough water has condensed into “clouds,” precipitation will begin. Water will drip from the plastic cling wrap back into your ocean. Some of that water will hopefully fall into the small container you placed into the middle of your “ocean.”
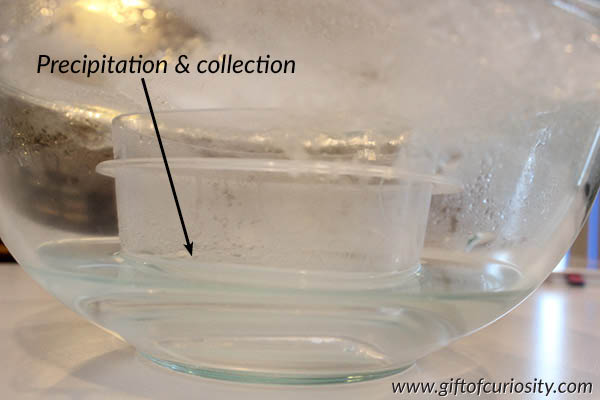
Step 7: Once you have collected sufficient rain water into your small container, take a drink. Notice how it isn’t salty compared to the “ocean water” you began with. That is because only the ocean water evaporates, not the salt that is in it. Thus, rain water is okay to drink even if it originally came from the salty ocean.

More weather resources
More weather posts from Gift of Curiosity:
- Books about the weather
- Weather 3-part cards
- DIY weather station
- Two ways to make a cloud in a jar
- Cloud classification activities
- Cloud classification craft
- Make it rain in a jar
- DIY weather vane
- Wind resistance experiment
- Make a tornado in a bottle
- How do hurricanes form?
- Make a hurricane
- Printable weather Bingo game
- Printable weather I Spy game