This post may contain affiliate ads at no cost to you. See my disclosures for more information.
Square wheels on a car? That’s crazy, right?
A car can’t roll on square wheels. Or can it?!
As it turns out, round wheels aren’t the only type of wheel that can get a car moving. Sometimes, square wheels are exactly what you need.
In this post I’m sharing a little lesson I taught about wheel shapes and giving you directions to make your own car with square wheels that will move smoothly on a special road you can build.
Note: For more kid-friendly engineering projects, see my Science Activities for Kids page.
Introducing the concept of square wheels
I did this activity with a small group of kids, and I introduced it by first asking them, “What would happen if you put square wheels on a car?”
I listened to their ideas, and then played the first 1 minute and 10 seconds of this clip from Mythbusters (but you can watch the whole video if you’d like).
We shared our reactions to the clip. (On the whole, the kids thought it was both cool and funny.)
Next, I had the kids watch this video comparing bikes with round and square wheels.
We discussed the conditions under which it would be better to have round wheels vs. square wheels. We were all impressed at how easily and smoothly the tricycle with square tires moved along the bumpy road.
Then I told them we were going to build our own cars with square wheels.
Cue the enthusiasm!
Materials needed to build a car with square wheels
Materials needed to build the road:
- 16 cardboard toilet paper tubes (all approximately the same diameter)
- Some sort of stiff posterboard, cardboard, or matboard to serve as the base for the road, cut to approximately 4-6 inches (10-15 cm) wide and 28-30 inches (70-75 cm) long.
- Hot glue gun and glue sticks (although in a pinch a good double sided tape should work as well)
Materials needed to build the car:
- Cardboard, posterboard, or matboard
- From a piece about 8 x 10 inches (20 x 25 cm) in size you will be cutting a rectangle for the car base that measures 2 x 5 inches (5 x 12 cm) and four square wheels approximately 2 x 2 inches (5 x 5 cm) – but see below for more details on how to get the appropriate size for the wheels.
- Scissors
- Optional: Serrated knife
- Pencil
- Ruler
- Pushpin
- Straw
- 2 bamboo skewers
- Paper clip
- Piece of string 12 inches (30 cm) long
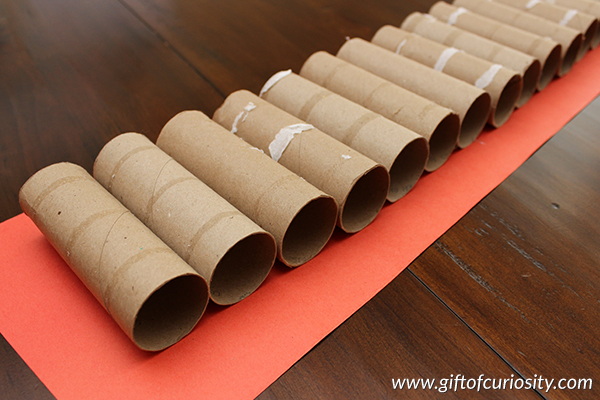
How to assemble your road
Use hot glue (or double sided tape) to attach the cardboard tubes to a piece of posterboard, cardboard, or matboard cut to approximately 4-6 inches (10-15 cm) wide and 28-30 inches (70-75 cm) long.
Do not leave any gaps between the tubes as you glue them on. The side of one tube should be touching the side of the next tube.
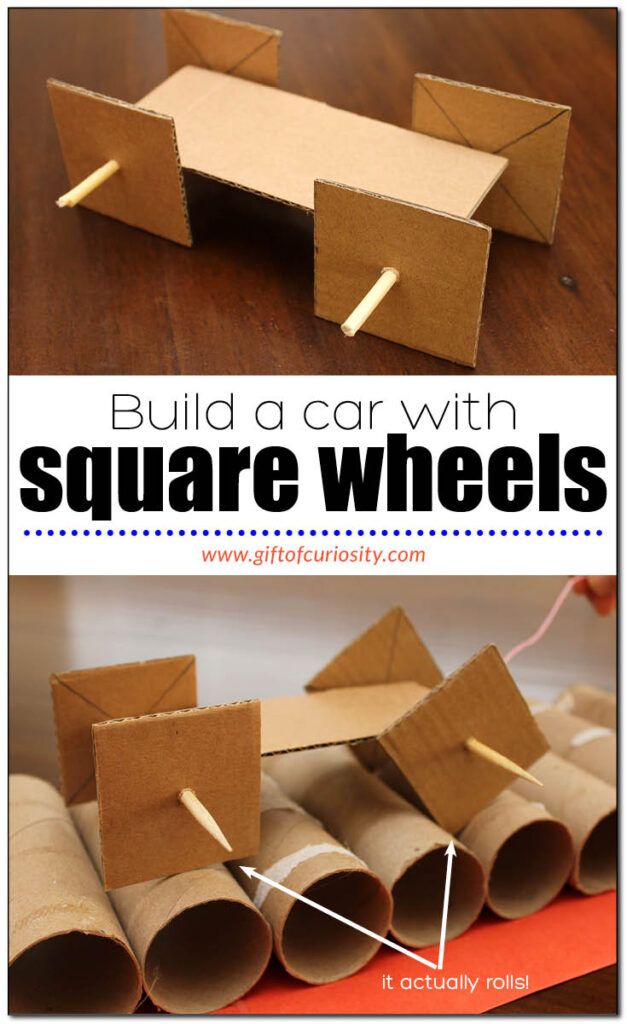
How to assemble your car
Make four wheels
Measure the diameter of your cardboard toilet paper tubes. (This is a good time to introduce your children to the meaning of “diameter,” which is defined as a straight line from one side of a circle to the other that passes through the center of the circle.)

If the diameter is close to 1 and 11/16 inches (4.3 cm), then you can cut four square wheels that all have 2 inch (5 cm) sides.
If the diameter is significantly different than 11 and 11/16 inches (4.3 cm), you will need to calculate the appropriate length of the sides for your wheels using this formula: Length = 1.2 x Diameter. Cut four square wheels of the appropriate size.
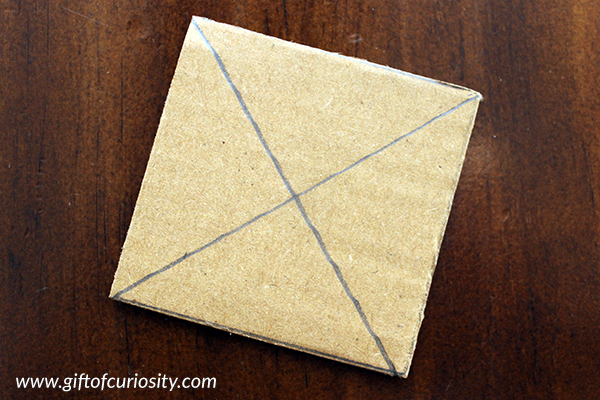
Use a pencil and ruler to draw two diagonal lines on your square so they cross in the middle.
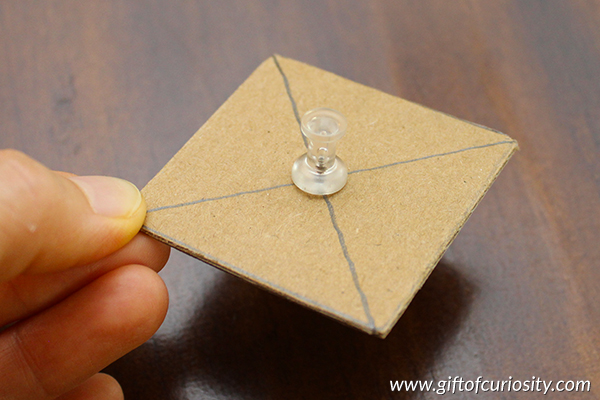
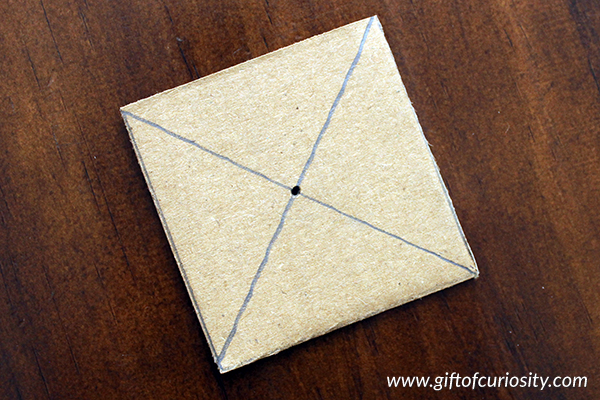
Use a pushpin to poke a small hole where the lines meet, which should be the center of your wheel.
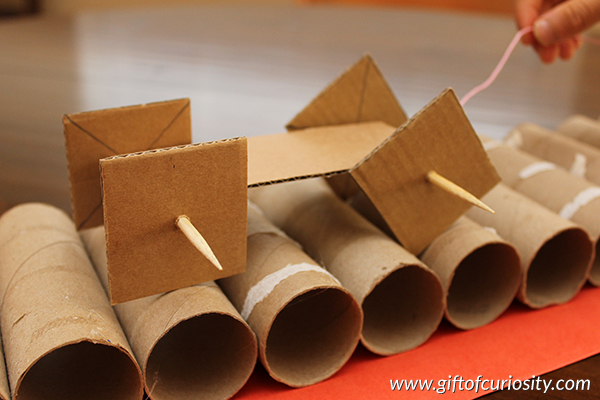
Make the body of the car
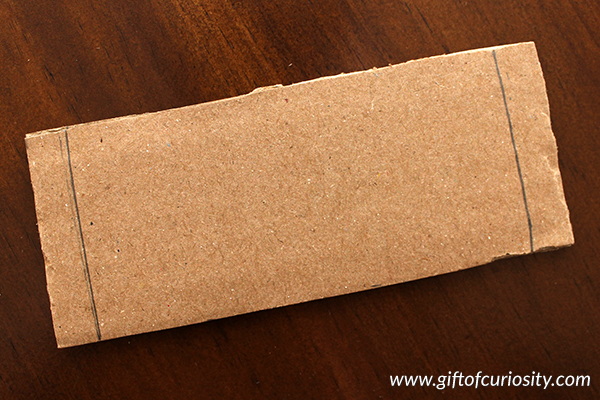
Cut a rectangle out of cardboard, posterboard, or matboard that is 2 x 5 inches (5 x 12 cm). Draw two lines across the body of the car that are 3/8 inch (1 cm) from each end.
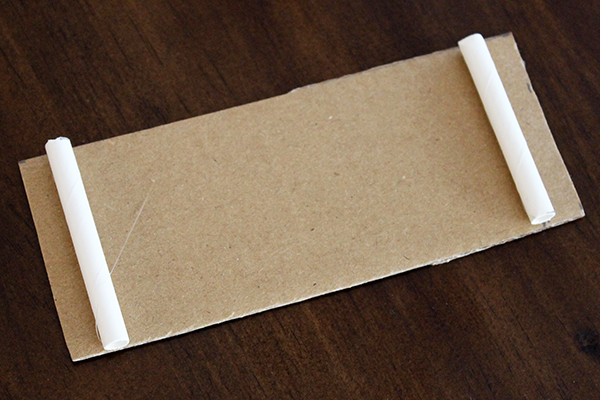
Use scissors to cut two separate 2 inch (5 cm) pieces of straw.
Use the hot glue gun to attach the straw pieces to the bottom of the car along the lines you drew that are 3/8 inch (1 cm) from each end.
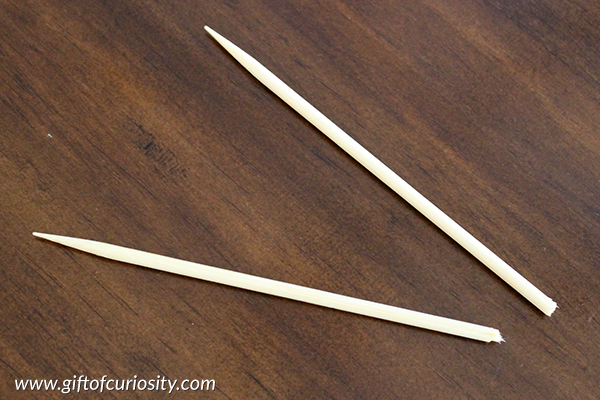
Use a ruler to measure 5 inches (12 cm) from the pointed end of each skewer, and make a mark with your pencil.
Cut the skewers along the marks so you have two pieces with a point that are 5 inches (12 cm) long. These will be the axles of your car. (Note that an adult may need to use a knife to cut the skewers).
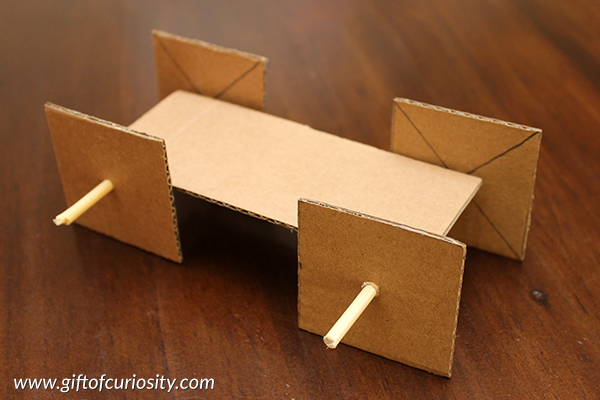
Slide one of the square wheels onto the pointed end of the skewer until it rests about 3/4 inch (2 cm) from the other end.
Slide the pointed end through one of the axles on your car, then slide the second wheel into place. Adjust the wheels as needed to ensure they are fairly close to the car. Test the wheel-and-axle assembly to be sure it can rotate smoothly and freely.
Assemble the second wheel-and-axle set in the same manner as the first.
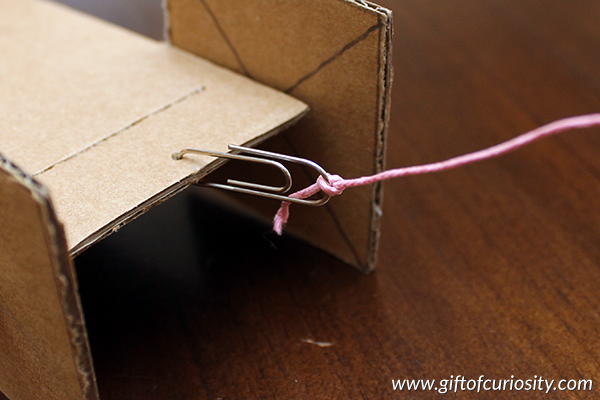
Use a pushpin to poke a hole about 1/4 inch (1/2 cm) from the front edge of the car. Then insert a paperclip into the hole and tie the string to the paperclip.
Now you are reading to take your car for a test drive!
Driving your car with square wheels
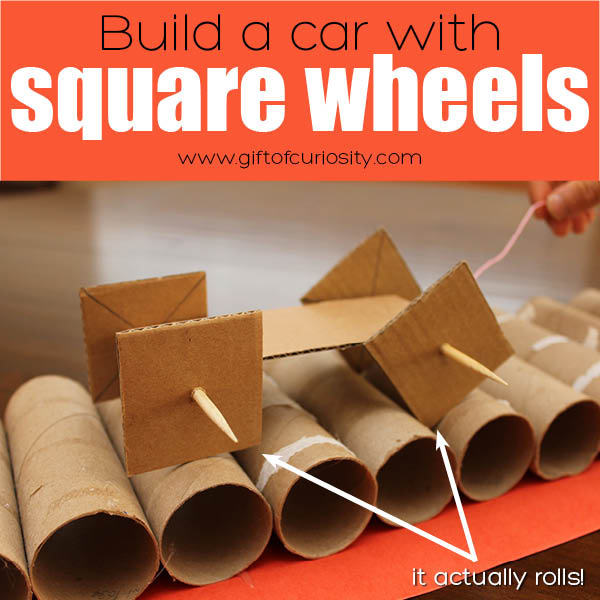
Now comes the fun part! Place your car at the end of the road you built. Make sure the tires are positioned so the pointed corners go into the space between the tubes. Once the car is positioned, use the string to pull it along the road and observe how it moves.
Notice how the wheel axles remain at a relatively constant height, even though the road itself goes up and down with lots of bumps.
Optional extensions
When we did this activity, one of the boys in the group wanted to explore what would happen if he traded the square wheels for round ones.
Initially he cut out some large round wheels. The car actually did okay on the bumpy road with the large round wheels. So another child suggested they put small round wheels on the car. We tried it, and the result was a much bumpier ride.
Take a look at this video to see some of our cars in action!
Debriefing the activity
After we finished building and testing our cars with square (and other shape) wheels, I invited the kids to watch one additional video featuring all sorts of wheel shapes going down special ramps.
I paused the video at several key moments to have the kids make predictions and to get their reactions on why certain things worked the way they did.
More Engineering Activities
Most STEAM and engineering posts from Gift of Curiosity:
- 15 engineering challenges
- Egg drop challenge
- Build a structure you can balance on one finger
- Creative marble run ideas
- Tower building challenge
Find more awesome engineering activities on my Engineering Challenges Pinterest board.